ショップ
- https://store.shopping.yahoo.co.jp/microfan/clcd-booster-r4-kit.html
- https://www.amazon.co.jp/dp/B0785C2NFJ
取扱説明書
製品概要
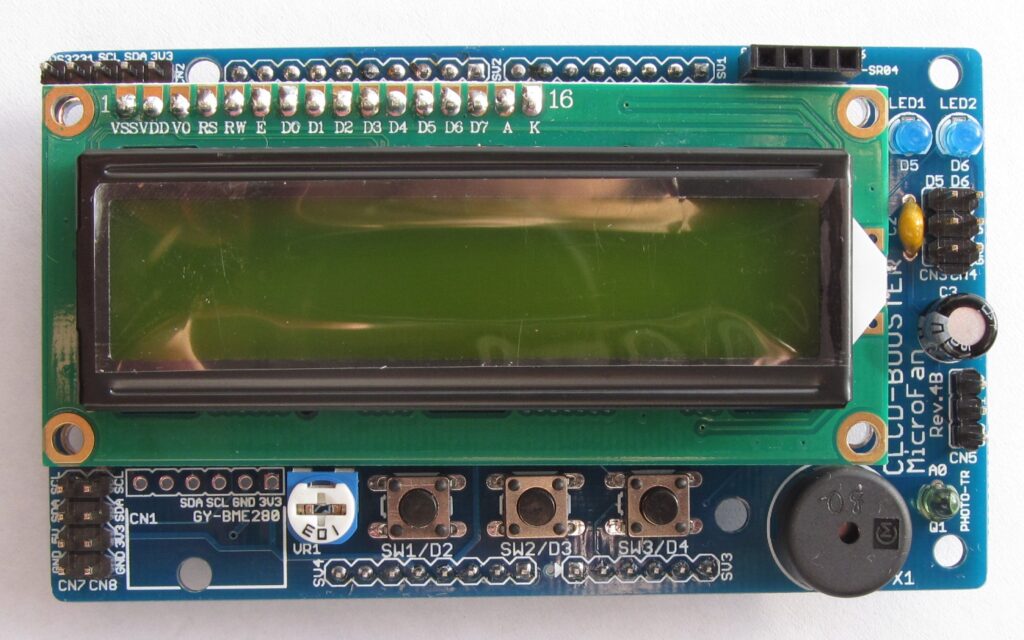
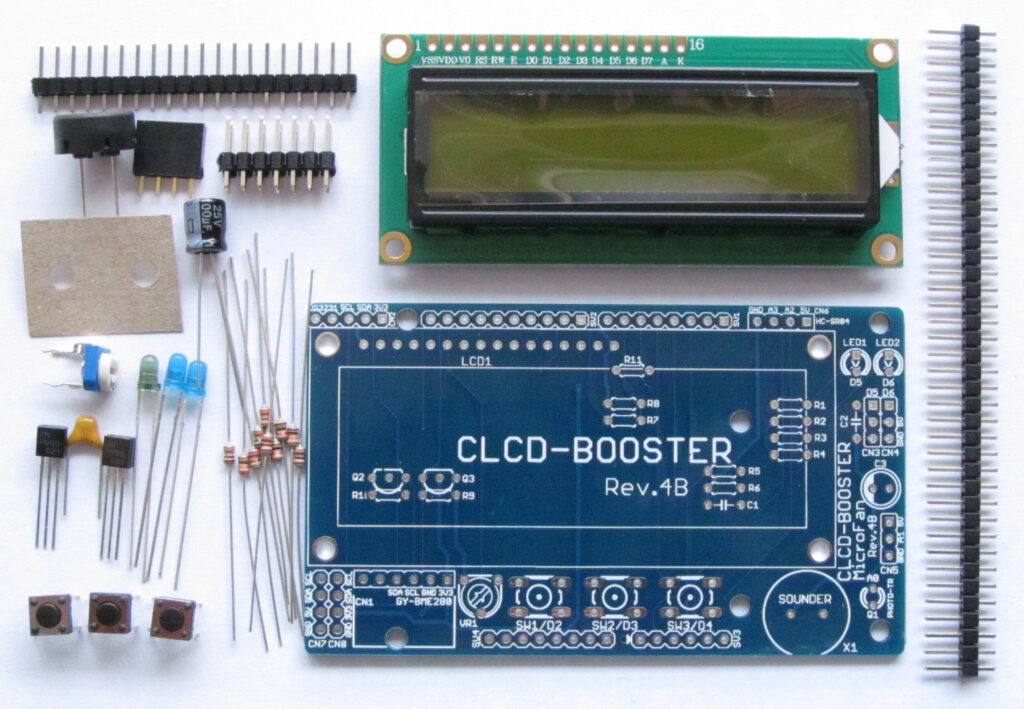
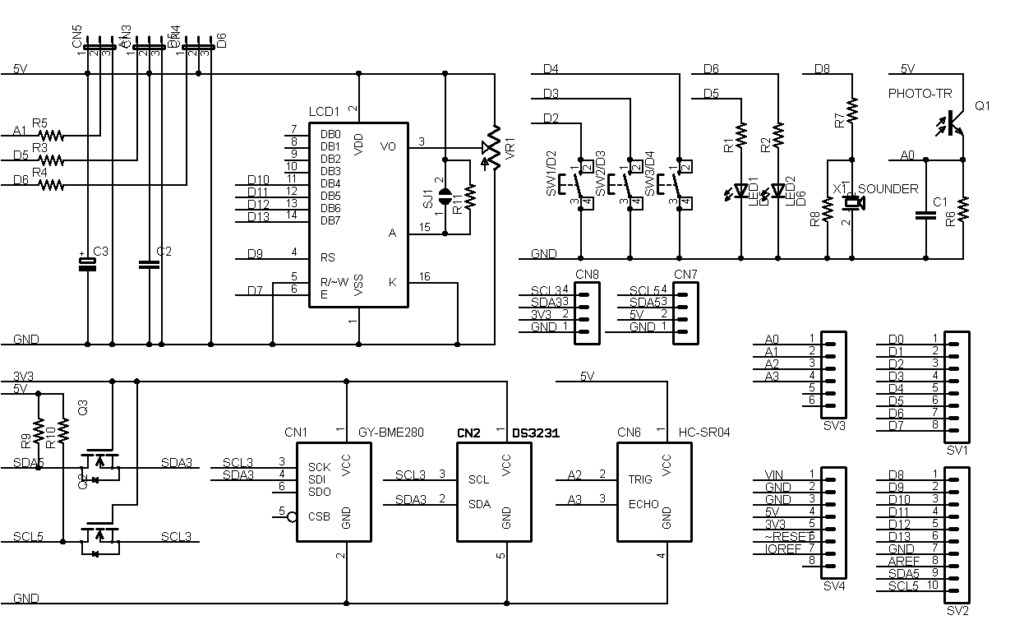
CLCD-BOOSTER は基本的で利用範囲の広い 16 文字× 2 行の文字液晶表示器を装備した、Arduino シールドキットです。CLCD-BOOSTER は Arduino の入門者にはもちろんですが、Arduino の基本機能を一通り習得し、応用に取り組みたい人が手元に置いておくと重宝する文字液晶シールドです。
CLCD-BOOSTER の特徴を以下に示します。
- バックライト付きの 16 文字× 2 行の文字液晶ディスプレイを装備し、ArduinoIDE に標準で組み込まれている LiquidCristal ライブラリですぐに利用することができます。
- 3 個のタクトスイッチを搭載し、入力や機能の選択に利用できます。
- 2 個の LED を搭載し、PWM の実験などにも利用できます。
- 圧電スピーカーを装備し、ビープ音などの電子音の出力が行えます。
- 明るさセンサーを装備しており、周囲の明るさを調べることができます。
- 環境センサー BME280 を搭載することができ、温度、湿度、気圧などを計測することができます。
- リアルタイムクロック DS3231 モジュールや超音波距離センサー HR-SR04 モジュール(別売り)の接続端子を装備しています。
- カラー LED WS2802/NeoPixel や RC サーボを接続できる端子を2個装備しています。
- 焦電(人感)センサー HC-SR501 などを接続できる端子を装備しています。
- 5V と 3.3V の I2C 接続端子をそれぞれ1個装備しています。
- Arduino UNO/MEGA/Leonardo R3 に接続して利用できます。
- 電子工作で広く利用されている Arduino のシールドとして開発されており、手軽に利用できる Arduino の IDE を利用して独自のスケッチを行えます。
回路図